Production Board
The production board is your live view of the shop floor. It shows every active work order organized by equipment, so you can see at a glance what's running, what's queued, and what needs attention.
Board Layout
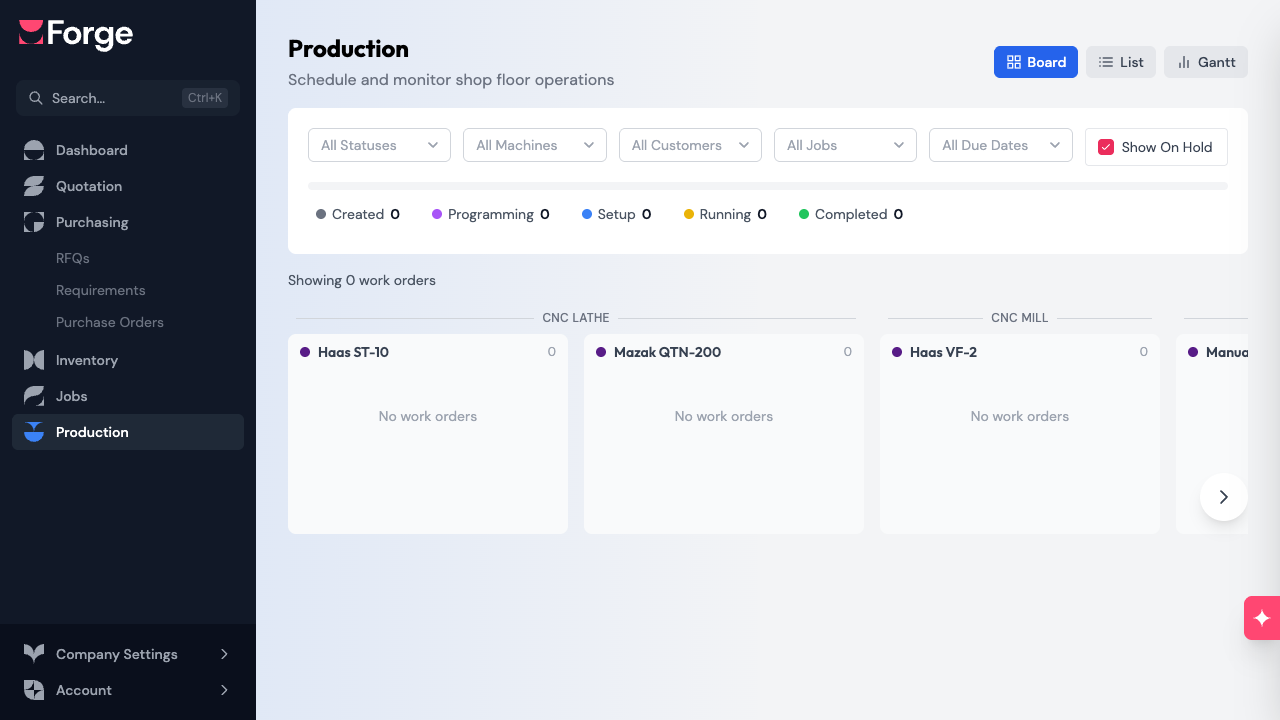
The board displays one column per piece of equipment, grouped by equipment type (e.g., CNC Mills, Lathes, Welding Stations). Each column contains work order cards stacked in queue order.
Outside operations (work sent to external suppliers) appear in separate columns on the right side of the board, grouped by operation type.
Use the left and right arrows to scroll horizontally if you have more equipment than fits on screen.
Views
The production page offers three ways to view your work orders. Toggle between them using the buttons in the top-right corner:
- Board — the default drag-and-drop board organized by equipment columns. Best for day-to-day shop floor management.
- List — a flat table of all work orders with columns for job, part, operation, machine, client, due date, quantity, and status. Good for searching and sorting.
- Gantt — a timeline view showing work orders plotted against your shop schedule. Useful for spotting scheduling conflicts and visualizing capacity.
Board Display: Cards, Compact, Summary
When the board fills up, change how much each column shows with the Cards / Compact / Summary switch to the right of the work order count. Forge remembers your choice in this browser.
-
Cards: the full work order cards described below, with phase controls, timers and inspection badges.
-
Compact: a two-line card per work order with only the essentials: part thumbnail, job number, part, operation, status, due date and ETA. Many more jobs fit on screen. You can still drag cards to reorder or move them. Clicking a card opens its routing panel and shows that card at full size, with its phase controls.
-
Summary: one tile per machine instead of cards. Each tile shows how many operations are queued, the remaining work in hours (programming, setup and run time of every unfinished operation; outside operations show their total lead time in days), and two warnings:
- Overdue: operations whose due date has passed.
- At risk: operations whose job is projected to finish after its promised date, or is blocked by a missing input.
A tile with neither warning reads On track. Click a tile to open that machine's cards in place while the other machines stay summarized, then click Back to summary to fold them again. You can drop a card onto a tile to move it to that machine.
Completed operations stay visible as cards until their job is finished, but they are not counted in the Summary.
Focus on a Job
When more than one job is on the board, a row of job pills appears above the columns. Each pill shows the job number, the client, and how many of the job's operations on the board are done (for example 1/4). Pills are sorted by due date. A red dot marks a job past its due date, and an amber dot a job that is projected to finish late or is blocked.
Click a pill to focus that job. Its operations stay at full size and are highlighted, while every other card shrinks to a compact card and fades, so you can see at a glance where the job sits across the shop. The board scrolls to the job's current operation. This works in every display: in Summary, focusing a job shows every machine's cards until you clear it.
- Shift-click another pill to compare several jobs at once.
- Click the focused pill again, click Clear, or press Esc to return to the normal board.
- Clicking a card while a job is focused highlights that card's routing. Close the routing panel to go back to the job focus.
The focus is not saved: it clears when you leave the page.
Work Order Cards
Each card on the board shows:
- Job number and part reference — click the job number to go to the job detail page
- Part number and name — what's being made
- Operation type — the manufacturing process (e.g., CNC Milling)
- Quantity — how many units
- Estimated time — total setup + run time
- Due date — highlighted in red if overdue, orange if due within two days
- Phase stepper — dots showing which phases apply (Programming, Setup, Running) and which is active
- Assignee — who is assigned to the current phase
- Part thumbnail — if files are attached to the part, a thumbnail image appears at the top of the card
- Status badges — "On Hold" or "Blocked" badges when applicable
Drag and Drop
You can drag work order cards to:
- Reorder within a column — drag a card up or down to change its position in the queue. The new order is saved automatically. This only changes the machine's queue; the sequence of operations within a part stays as defined in the job's routing.
- Move between equipment — drag a card to a different equipment column to reassign it. Forge only allows moves to equipment that is configured for the work order's process type — invalid targets are dimmed during the drag.
Process constraints: If you have a CNC Milling operation, you can only move it to equipment that has been set up for the CNC Milling process. This prevents accidentally assigning work to the wrong machine.
Filtering Work Orders
Use the filter bar at the top to narrow down what's visible:
- Status — show only work orders in a specific phase (Created, Programming, Setup, Running)
- Machine — show only work orders for a specific piece of equipment
- Client — filter by client
- Job — filter by a specific job
- Due date — show overdue items, items due today, or items due this week
- Show On Hold — toggle to include or exclude work orders that are on hold
- Show only at-risk — show only work orders whose job is projected to finish late or is blocked
The status pipeline bar below the filters gives a visual summary of how many work orders are in each status. Click a segment to filter by that status.
Any filter that is narrowing the board is tinted blue, so you can tell at a glance that some work orders are hidden. Click Clear filters, next to the work order count, to reset them all.
To find one job on the board without hiding the others, use the job pills instead (see Focus on a Job above).
Selecting a Work Order
Click a work order card to select it. When selected:
- The card is highlighted with a colored ring.
- All other work orders for the same part are also highlighted, showing the full routing sequence.
- Connector lines are drawn between related work orders so you can trace the flow across equipment.
- A routing flow panel appears on the right side of the screen, showing materials, purchased items, and all operations for that part — with their received/completion status.
Click the card again or click anywhere on the background to deselect.
The Routing Flow Panel
When you select a work order, the routing flow panel shows the complete picture for that part:
- Materials — each raw material needed, with a checkmark if it has been received
- Purchased items — each purchased component, with receipt status
- Operations — each work order in sequence, showing its status (pending, in progress, completed) and the assigned machine
This panel helps you answer questions like "Can we start this operation? Have the materials arrived? Are the upstream operations finished?"
You can also view attached part files (drawings, 3D models) from this panel.
Operator View
If you're logged in with an operator role (someone who can view production but not assign work), the board automatically filters to show only work orders assigned to you. Work orders where you're assigned to a later phase (but someone else is working on the current phase) appear dimmed with a "coming up" indicator.
Related Articles
- Work Orders — how work orders are created and configured
- Releasing a Job to Production — how a job's operations join these queues, and why card order now drives the schedule
- Tracking Progress — starting, completing, and timing work orders
- Jobs Overview — understanding the jobs that feed the production board